ArtNouveauVision Blog

8 Damage-Free Wall Solutions on How to Hang Wall Art Without Nails?
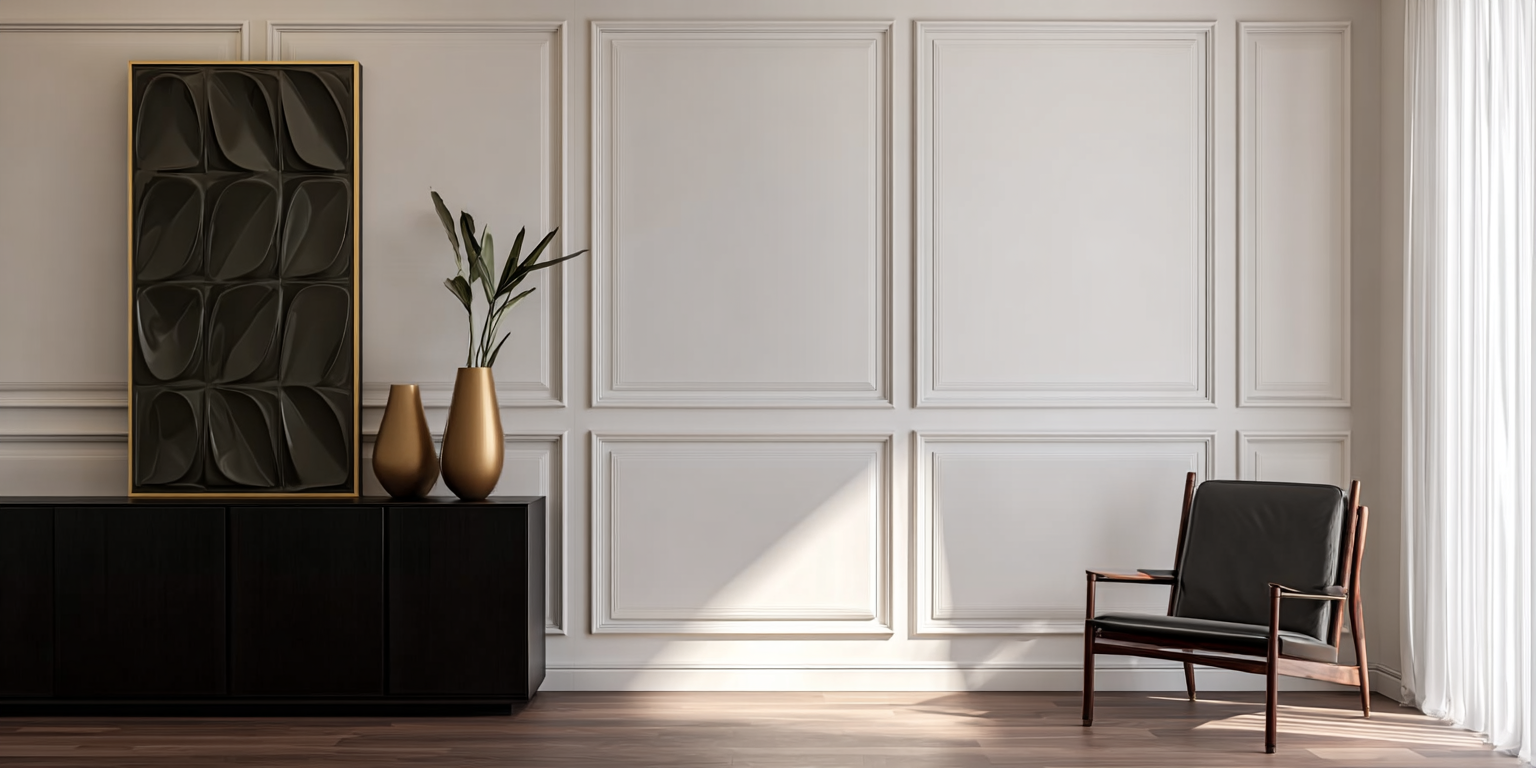
In home decor, wall art can enhance the atmosphere of a space and reflects the owner’s taste. However, using nails isn’t always ideal. You may want to avoid leaving large holes in the wall, lack the tools to drill or hammer, or plan to frequently change your art or its arrangement. That’s when knowing how to hang wall art without nails comes in handy.This article introduces 8 effective methods on how to hang wall art without nails, along with practical tips based on different wall materials.Why Do You Choose Hanging Wall Art Without Using Nails? In home decor, hang wall art can add artistic flair to blank walls; it also expresses the resident’s personality and taste. While traditional nail-based installation is secure, it often leaves behind unsightly holes that are difficult to repair. Moreover, many modern households favor a flexible and ever-changing interior style. You might want to hang a piece of artwork today and switch to a photo wall tomorrow. Traditional drilling simply doesn’t meet the needs of such frequent changes. That’s where nail-free hanging solutions come in. Designed to offer low damage and high flexibility, these methods protect your walls while making installation quicker and more versatile.5 Methods on How to Hang Wall Art without Nails Want to hang wall art and beautify your walls without leaving holes behind? Here are eight easy-to-install, wall-friendly solutions that don't require drilling. These methods suit various wall materials and interior styles, offering a balance of practicality and aesthetics. 1. 3M Command Hooks / Strips One of the most popular and well-reviewed nail-free solutions. Designed specifically for home walls, 3M Command hooks and strips leave no marks or residue upon removal—ideal for painted walls, tiles, and wooden panels.Pros: Supports 3–6 kg, perfect for most small- to medium-sized art Available in various sizes and colors to match different frame styles Safe removal with stretch-release strips, no wall damage Cons: Clean the wall surface thoroughly before applying Not recommended for damp or chalky walls (e.g., old plaster) 2. Nano Adhesive Tape Nano double-sided tape is a transparent adhesive that blends in with the wall. It’s easy to trim to size, ideal for lightweight frameless prints, small art boards, or photo walls.Pros: High transparency; mounting points are barely visible Washable and reusable, eco-friendly Great for light posters, puzzle art, or wall decals Cons: Adhesion may weaken with humidity or heat—best in dry areas Not suitable for rough or grainy walls (e.g., cement, brick) 3. Magnetic Art Hanging System Uses magnetic strips and metal plates to secure artwork without damaging walls. Perfect for displaying art prints, kids’ drawings, or frequently rotated posters.Pros: Easy to replace artwork without removing hardware Sleek, modern design suitable for minimalist or Nordic décor Reusable; ideal for long-term wall styling Cons: Requires metal base plate to be installed—choose a permanent location Not suitable for heavy or thick-framed artwork 4. Picture Rail Hanging SystemCommon in galleries and commercial spaces, this system uses ceiling or wall-mounted rails with adjustable wires and hooks for professional-grade flexibility.Pros: Great for multi-piece arrangements Once installed, artwork can be moved or changed freely Perfect for hallways, staircases, or exhibition-style setups Cons: Installation is more complex; requires tools like drills and levelers Best for users comfortable with basic DIY or home renovations 5. Rope Suspension Method Install hooks or anchors near the ceiling, then suspend wire or rope to hang artwork. This method suits industrial or loft-style interiors with a creative touch.Pros: Adjustable hanging height; adds visual interest Artistic and unconventional presentation style Can display multiple artworks in one line Cons: Requires ceiling or upper-wall drilling to secure anchor points Not ideal for heavy frames or elaborate artwork Considerations for Different Wall Materials (Detailed Guide) The type of wall surface is a key factor you should consider when you hang wall art without nails. Each wall material has different requirements on adhesives, weight-bearing, and hook stability. Using the wrong method may lead to artwork falling, paint peeling, or even safety hazards. 1. Painted Drywall (Latex Wall Paint)This is the most common indoor wall type. It is compatible with 3M Command strips, nano adhesive tapes, and other similar solutions. But, you must ensure if the wall surface is chalking, grease, or moisture. Always clean and let it fully dry before application.2. Tile / Glass WallsThese smooth, hard surfaces work well with strong adhesive solutions like nano tape and magnetic systems. However, due to their dense surface, adhesion may be reduced. It’s highly recommended to select those products with high bonding strength and avoid installation in humid areas.3. Wooden Walls / Furniture BackboardsThese are suitable for adhesive wall hooks or no-damage pin-style hooks. Ensure the wood surface is intact without peeling or flaking paint. Lightweight artwork usually adheres well, but for medium-sized pieces intended for long-term hanging, test the weight support beforehand.4. Rough Concrete or Exposed Brick WallsThese surfaces are uneven and not ideal for adhesive products, as sticking power is usually poor. Instead, use floor-standing frames, display easels, or a ceiling-mounted picture rail system for hanging from above. These methods bypass the limitations of rough surfaces and offer safe, long-term display options.Recommended Wall Art for Nail-Free Installation Choosing the right type of wall art to hang wall art without nails can help protect your walls from damage. It also improves installation safety and stability. The following types of artwork are lightweight, flexible in size, and available in various styles—perfect for use with 3M hooks, nano adhesive tapes, magnetic systems, and more. These options make it easy to hang wall art and elevate your home décor with minimal effort. 1. Lightweight Canvas Prints – No Glass, Easy to HangCanvas prints are frameless artworks printed on fabric and typically stretched over a wooden frame. They are lightweight and don’t require glass or bulky outer frames, making them ideal for mounting with Command strips or nano adhesive tape. Best for: Living room walls above the sofa, bedroom headboards, hallway decoration Style Tips: Choose large-sized but lightweight canvases to make a bold statement without overloading the hooks Recommended Styles: Abstract oil painting, minimalist color schemes, Instagram-style botanical prints 2. Frameless Poster Prints – Ideal with Magnetic Hanging SystemsFrameless poster art typically comes as printed paper or flexible fabric and is displayed using magnetic poster hangers or rails. These pieces are light, easy to replace, and perfect for renters or those who frequently update their décor. Best for: Kids' rooms, study areas, rented bedrooms Style Tips: Use magnetic rails to secure the top and bottom edges—no nails needed and quick to swap out Recommended Styles: Movie posters, retro illustrations, typography prints, children’s creative art 3. Puzzle-Style Multi-Piece Wall Art – Great with Adhesive StripsAlso known as gallery wall sets or panel art, these collections consist of several artworks in matching sizes. They can be freely arranged and create a rich, layered visual effect. Since each piece is small and light, nano tape or adhesive hooks are perfect for installation. Best for: Entryways, staircases, above the sofa Style Tips: Choose a consistent visual theme such as black-and-white photography or cityscapes for a cohesive look Recommended Styles: Geometric designs, abstract color blocks, family photo collages 4. Minimalist Line Art Prints – Clean Style, Ideal for Standing or Shelf DisplayLine art illustrations use black or monochrome lines to create simple, airy visuals. These artworks don’t rely on heavy frames or elaborate setups, making them great for display on shelves, console tables, or nightstands using stands or leaning frames. Best for: Bedrooms, home offices, vanity corners Style Tips: Pair with wooden frames and green plants to create a cozy, artistic vibe Recommended Styles: Feminine line portraits, minimalist still lifes, abstract silhouette drawings FAQs1. Do no-nail hanging methods provide good weight support?It depends on the method used. Typically, 3M Command strips and rail systems can support 3–6 kg. It’s best to choose lightweight artwork for optimal results.2. Will adhesive strips really not damage the wall when removed? When used correctly and removed using the stretch-release technique, they usually leave no trace. It's recommended to test a small area first.3. Can I use no-nail methods on slightly rough walls? In such cases, try using stand-supported placement or a rail system that doesn’t rely on adhesive.ConclusionNow, I believe you’ve known how to hang wall art without nails. By choosing the right no-nail hanging method, you can protect your walls while expressing your style. Try combining different techniques and let your walls come to life with creativity and charm!
Learn more
How to Hang Art on Concrete Wall?
You may feel that it can be difficult to hang artwork on concrete walls. But with the right tools and techniques, you can safely display your favorite wall art without damaging the walls. Check out our Geometric Wall Art collection. Whether you are decorating an office, a basement, or a house with concrete walls. This article will show you the best way to install them in a sturdy and elegant way. 1. Choose the Right Hanging Method Since concrete walls are harder than plasterboard. Therefore, you can't use traditional nails to hang wall art. Typically, there are three common ways to hang wall art on concrete walls. Depending on the weight and size of the item, you can use sticky wall hooks, hard wall hooks, or masonry screws. 1.1 Sticky Wall Hooks Sticky wall hooks are best for hanging small photos and lightweight wall art. See our selection of Minimalist Wall Art. Discover more options in our Contemporary Wall Art collection. They have an adhesive base that sticks firmly to the wall. Depending on the brand, adhesive wall hooks can typically hold up to 6 pounds. So if you don't want to drill holes in a concrete wall, sticky wall hooks are ideal. Even better, they are very easy to install and can be done in less than a minute. Here are the steps for using sticky wall hooks: First, clean the area where you will be using the sticky wall hooks. Make sure the concrete wall is clean, dry, and free of grease. Once the clean area is dry, mark the wall where you want to install the sticky wall hooks. Remove the liner paper from the back of the sticky wall hook and press firmly. Rubbing or sanding the adhesive with a hard, smooth object will better activate the adhesive. Wait 24-48 hours before hanging any wall art. This will allow the adhesive to properly adhere to the wall. It is important to note that if your wall art is heavier than the weight-bearing capacity of the adhesive wall hooks. Then, you will need another hook with more support. 1.2 Hard Wall Hooks Hard wall hooks are also known as hard wall plastic hooks. These are concrete art hooks that are fastened to the wall using small metal nails. They are suitable for concrete, cement, cinder blocks, thin plaster over concrete, small smooth tiles, soft stone, and hardwood. Common hard wall hooks are available in small and large sizes, with weight capacities of 20 lbs and 30 lbs, respectively. Additionally, these hooks are more advanced than adhesive wall hooks, but just as simple to use. Installation requires only a hammer and two minutes of your time. First, hold the back of the hard wall plastic hook against the wall with your thumb and index finger. Keep the hook as tight and stable against the wall as possible. Simultaneously, hammer all the pins into the wall. Watch your fingers during this process. Stop hammering when all the pins are flush. Excessive hammering will weaken the grip of the hook. To remove the hook, slide a small blade between the wall and the back of the hook and gently peel it off. It is important to note that discard any removed hooks and do not reuse them. On the other hand, for heavier and larger wall art, you will need to use something more sturdy, such as masonry screws. 1.3 Masonry Screws Also known as concrete screws, these durable hangers are used for concrete, concrete block, brick and mortar applications. These little things have a pointed head that can be driven right into the concrete. Masonry screws are strong enough to suspend framing when driven 1 ¼ to 1 ½ inches deep into a wall for maximum holding power. While masonry screws and concrete walls can be a daunting combination. But knowing all about them is essential if you want to install larger wall artwork with ease. You may wonder if it is suitable to hang wood carvings in the bedroom. Moving on, let's learn how to use masonry screws: First, decide where you want to place the picture or artwork. Then mark the location of the holes. Prepare an electric drill by attaching an appropriately sized masonry bit to a hammer drill. The holes should be drilled ½ inch deeper than the screws. This ensures that the screws will not bottom out in the hole. Drill the pilot hole at the slowest speed possible. Hold the hammer drill so that it is perpendicular to the wall. Remove the drill occasionally and remove dust with compressed air or a vacuum cleaner. When the hole is free of debris, place the bit back into the pilot hole and drill at medium speed. Stop when the desired depth is reached. Finally, insert the masonry screws and you're done. Then, you're ready to hang pictures and artwork on your concrete walls. Discover how to hang wall art without nails. Learn more about how to hang wall art. We know concrete screws look great, but they're not the only hardware available. Next, let's take a look at other ways to hang wall art on concrete walls. 2. Other Masonry Hanging Hardware In addition to standard picture frames, there are many other masonry hardware options available. Examples include sleeve anchors, recessed anchors, and split drive anchors. They allow you to hang large mirrors, wall art, shelves, and other heavy items on concrete walls. You can find these tools at your neighborhood hardware store. Here is what you should know: 2.1 Concrete Screws These are 3/16-inch screws with Phillips and hex heads. They are heavy-duty screws for quickly and securely fastening things to concrete walls. 2.2 Brick Clips These hooks allow you to hang photos or artwork on a brick wall without having to drill holes in the brick. They have a weight capacity of 25 pounds and are only suitable for brick walls with recessed mortar joints. In addition, brick clips need to protrude at least 1/4” from the brick wall to be securely fastened. 2.3 Wall Anchor Screws This hook is a screw and anchor in one. It can be used on drywall, plaster, brick, and concrete. Wall anchor screws have stronger threads and therefore have more holding power than regular screws. 2.4 Guide Anchors These anchors are designed for #10-#14 screws and can be installed in brick, concrete block or concrete walls. 2.5 Premium T Anchors It can be used to install a wood frame on a brick or concrete wall. They are optional, but their purpose is to keep the frame strong, burglar-proof, and prevent it from tipping over. 3. Summary While hanging wall art on a concrete wall may be overwhelming at first. However, all you need are the right tools and concrete art hanging pieces. With these tools and tips, you can create a beautiful space on a blank wall. Explore our complete selection of wall art.
Learn more
What is the Golden Ratio for Hanging Art?
Decorating your home with wall art may revolutionize your living space. However, how you hang your artwork is just as important as the artwork you choose. The golden ratio is a time-tested method of achieving visual harmony. Generally speaking, the golden ratio refers to arranging items in a certain proportion to create harmony. For many artists, this mathematical formula is known as the “divine proportion.” It has been used in artwork, architecture, and design for thousands of years. Next, we'll come to a complete guide on the Golden Ratio for hanging artwork. Including tips on how to create balanced and visually acceptable displays. In addition, we'll cover the Golden Ratio for photo walls and the Golden Rule for canvas sizes. For those interested in abstract designs, visit our collection of Abstract Wall Art. 1. How Do I Calculate the Golden Ratio for a Photo Wall? The golden ratio is usually represented by the Greek symbol φ, which is approximately 1.618. This mathematical ratio can be seen in nature, art, and architecture. It is known for its natural and harmonious qualities. The golden rectangle is a shape whose sides follow the golden ratio. It is commonly used in art and design to create harmonious compositions. When used to hang artwork, the golden ratio can help produce a harmonious look that is both natural and eye-catching. On the other hand, the golden spiral is an extension of the golden section. It is another concept based on the golden ratio. It reflects recognizable graphic forms in nature, such as the nautilus shell. Therefore, the golden spiral can also be used to create harmonious compositions in art and design. To apply the golden ratio to a photo wall, first determine the focal point of the display. This could be a large centerpiece or an important object that you want to highlight. From there, you can arrange the other pieces around it while keeping the spacing and size ratio at 1.618. 1.1 Determining the Center of Focus Choose the focal point of your photo wall and set it at eye level. The height is usually about 57-60 inches from the floor to the center of the piece. This is usually considered the ideal viewing height for most people. For a clean and modern aesthetic, explore our Minimalist Wall Art collection. 1.2 Spacing and Alignment Use the Golden Ratio to guide the placement of additional pieces by placing them around the centerpiece. For example, if the centerpiece is 24 inches tall, then the pieces on either side should be 15 inches apart (24 divided by 1.618). This creates a sense of balance and visual continuity that is appealing to the eye. 1.3 Balancing Size When selecting artwork for a photo wall, try to choose a variety of sizes that fit the golden ratio. If you have a large focal element, then the surrounding sections should be proportionally smaller. This strategy ensures that no single element dominates, thus making the photo wall look more cohesive. Prefer geometric patterns? Take a look at our Straight Line Wall Art. 2. What is the Golden Rule of Canvas Size? The size of your canvas artwork is critical to achieving a balanced and visually appealing display. The golden rule of canvas sizing is to select artwork that fits the dimensions of the wall space while retaining the proportions dictated by the golden ratio. This creates a properly proportioned decorative effect. For more tips on how to hang wall art, visit hang wall art. 2.1 Measuring the Wall Space Start by measuring the height and width of the wall on which you intend to hang your artwork. This will help you calculate the maximum and minimum dimensions of the canvas work. If you’re considering natural materials, find out whether it’s appropriate to Hang Wood Carvings in the Bedroom. 2.2 Creating a Balanced Display Once you have determined the size of your centerpiece, you can apply the golden ratio to select complementary elements. This creates a visually appealing and balanced layout. 2.3 Consider the Function of the Room The purpose of the room will also affect the size of the canvas you choose. Larger-sized pieces that make a statement can serve as focal points and add drama to living and dining rooms. Smaller, more intimate pieces are perfect for bedrooms or dens. Learn How to Decorate a Large Wall for maximum impact. 3. To Summarize Hanging artwork in the Golden Ratio is therefore the traditional way to create a balanced and harmonious display in your home. If you understand the principles of the golden ratio and the golden rule of canvas size. Then you can design visually appealing arrangements that add to the beauty of your premises, such as a personal wall art gallery. These tips can help you easily create the desired look. Whether it's curating a photo wall or choosing the right size canvas. Let the golden ratio guide your creative process and transform your home with artfully assembled pieces. With these tips, you'll be well on your way to creating a beautiful and balanced art exhibit. At Art Nouveau Vision, we are committed to providing you with the right wall art to build the gallery of your dreams. Our range of wall art products is extensive and of the highest quality. As a result, you can rest assured that the Golden Ratio will be utilized in your art display. 4. Frequently Asked Questions 4.1 What is the Two-thirds Rule for Hanging Artwork? The two-thirds rule for hanging artwork means that the artwork should occupy approximately two-thirds of the width of the furniture or wall. This rule ensures that the artwork is proportionate to the surrounding elements, resulting in a balanced and visually appealing display. In addition, using the 2/3 rule in wall design helps to create a harmonious layout. This ensures that the overall picture is balanced and attractive. 4.2 What Are the 60-40 Guidelines for Hanging Artwork? The 60-40 rule for hanging artwork divides the wall into two distinct sections: one for the artwork and the other for the open space. This allows for a balanced and visually appealing display. The rule states that the artwork should occupy about 60% of the wall area. The remaining 40% is open space. Additionally, this principle can be applied to creating a gallery wall. You might consider stacking overlapping photos of varying sizes at the top and bottom to create a cohesive overall image. This strategy ensures that the artwork jumps off the page while keeping the wall and room manageable.
Learn more
Is it Suitable to Hang Wood Carvings in the Bedroom?
When considering bedroom decor, the atmosphere you create matters just as much as the furniture you choose. Among the rising trends in interior design, wooden wall decor is making a notable comeback—and for good reason. Its organic warmth, timeless appeal, and capacity to reflect personal style make it a wonderful addition to nearly any space, especially the bedroom. But is it truly suitable to hang wood carvings in such an intimate, restful environment? The answer is a resounding yes—when chosen thoughtfully. Why Choose Wooden Wall Decor for Your Bedroom? Bedrooms are personal sanctuaries. Unlike public spaces like the living room or kitchen, they offer the chance to express a more intimate aesthetic. Wood carvings, with their natural textures and unique patterns, infuse warmth and comfort, two essential qualities of a cozy bedroom. Wood also carries emotional weight. For example, a hand-carved panel depicting a serene forest scene can evoke childhood memories of camping, hikes, or tranquil retreats in nature. That nostalgic, emotional connection helps transform a bedroom from a mere sleeping space into a comforting retreat. Moreover, wooden decor often creates a soothing visual and tactile experience. The subtle grain lines, smooth finishes, or intricately carved details draw the eye and offer a level of craftsmanship that mass-produced art often lacks. This sense of authenticity can significantly enhance your room's calming effect. Style and Substance: Matching Decor with Mood Wood carvings come in various themes and styles. Some showcase the elegance of floral or abstract Art Nouveau designs, while others reflect rustic or tribal motifs. The key to making them work in your bedroom is to align them with your intended mood: Serenity: Choose flowing, symmetrical designs like vines or mandalas. These pieces promote balance and peace, perfect for unwinding after a long day. Inspiration: Opt for carvings of birds in flight, mountain ranges, or celestial elements. These inspire imagination and lift your spirits. Rustic warmth: Lean into textured, raw-edge pieces made from reclaimed wood. These work wonderfully in farmhouse or cottage-style interiors. Modern elegance: Minimalist, geometric carvings in smooth, stained wood tones suit contemporary bedrooms beautifully. Explore a wide range of designs in our Wood Wall Art to find pieces that best align with your bedroom's ambiance. Durability and Practicality One concern some homeowners have is whether wood carvings are durable enough for a bedroom environment. In fact, bedrooms tend to be one of the best locations for wood art. Unlike kitchens or bathrooms, which experience high humidity and temperature fluctuations, bedrooms maintain more stable conditions, making them ideal for preserving carved wood pieces. Additionally, high-quality wood carvings are often made from durable hardwoods like oak, teak, or walnut. These woods are naturally resistant to cracking or warping over time. To better understand which types of wood fare best over time, check out our in-depth post: the durability and texture of different wood carvings. Choosing the Right Piece for Your Space Not all carvings are created equal. When selecting art for your bedroom walls, consider these key factors: Size: Large panels can anchor a wall behind the bed or serve as a visual centerpiece. Smaller pieces work well in reading nooks, along narrow walls, or grouped in a gallery-style arrangement. Color: Light woods like birch, ash, or maple can brighten darker rooms. In contrast, darker woods like walnut or mahogany add depth and richness to rooms with lighter color palettes. Framing and Finish: A natural finish emphasizes the wood's grain and authenticity. Painted or stained pieces can complement other colors in your bedroom, tying the whole design together. Theme Consistency: Choose motifs that echo or complement other design elements in your space—floral carvings in a botanical-themed room, for instance, or abstract art in a minimalist setting. Need help deciding what would look best? We cover essential tips in our blog: choose the best wood carvings. Placement Ideas: Where to Hang Wood Carvings in the Bedroom Wondering where to display your wooden wall art for maximum effect? Here are a few placement ideas that work especially well: Above the Headboard: A horizontal or triptych carving anchors the bed and creates a focal point. Opposite the Bed: Let the first thing you see in the morning be something beautiful and inspiring. Reading Corners: A single small carving can warm up a reading nook, adding both texture and personality. Gallery Wall: Mix wood carvings with framed artwork or photos for a dynamic, layered look. Maintenance Tips: Keeping Your Decor Pristine Worried about dust or damage? Wood carvings are easier to maintain than you might think. Regular dusting with a microfiber cloth and occasional light cleaning go a long way in preserving their beauty. Be sure to avoid excess moisture, direct sunlight, and harsh chemicals to keep your carvings in pristine condition. If you’re unsure how to safely clean your piece, our blog post How to Clean Wood Carvings Without Damaging the Art offers step-by-step guidance to help keep your pieces looking like new for years to come. Final Thoughts Wood carvings are not only suitable for bedroom decor—they can be transformative. The right wooden wall decor elevates your space, reflecting your unique style and creating a mood that supports rest, relaxation, and inspiration. Whether you’re curating a serene oasis, a cozy hideaway, or a stylish sanctuary, wood carvings offer an artistic, enduring, and meaningful touch. With the vast options available today, incorporating wood art into your bedroom is not just feasible—it's a design-savvy choice with lasting emotional and aesthetic value. Explore our full collection and find the piece that speaks to you.
Learn more
How to Frame a Canvas Print?
Canvas prints are popular because they are inexpensive. It is a very durable wall art. The canvas used for prints is coated in a bright white color, which gives it a lively and vibrant look. Canvas prints can come in matte, glossy, satin, or metallic finishes. In addition, framing canvas prints can enhance the artwork and give it a more attractive appearance. Since many canvas prints are flat, they are easy to frame. Canvas prints are often rolled up, so they must be stretched before framing. This process requires careful and precise techniques to ensure that the canvas print fits perfectly into the frame. Next, Art Nouveau Vision will show you how to frame a canvas print. 1. How to Frame a Canvas Print? Framing a canvas print is an art that requires skill and expertise. The following is the process of preparing, framing, and storing a framed canvas print. 1.1 Choosing the Right Frame Custom picture frames are available in a wide range of materials, styles, and colors, offering you many possibilities. Before choosing a frame, carefully study the style and aesthetics of your canvas print. The frame you choose should complement the canvas print, not overpower or detract from its impact. For example, a dark frame may make a light-colored canvas print stand out. Classic pieces complement traditional, sophisticated frames. If you're not sure what color to choose, then opt for white or black. Both of these colors look great with all styles of canvas prints. In addition, these colors complement most interiors. Another key consideration is the space where the artwork will be displayed. Make sure that your canvas print complements its surroundings. 1.2 Measuring Canvas Prints Measuring a canvas print is an important step before framing it. First, leave an extra canvas at the edges to fold over the stretching bar. Therefore, your measurements must be precise to ensure that the canvas print fits perfectly into the frame. Since canvas prints are usually not square. Therefore, measure the top, center, and bottom of the canvas to get the correct proportions. Place the canvas print in the direction you intend to view it. Then, measure the height, width, and thickness of the item. Include folded corners, which may add an eighth of an inch to the measurement. If your measurements fluctuate, choose a frame based on the largest gauge. This ensures optimal spacing and alignment. 1.3 Preparing the Frame If your canvas print is a rolled canvas, unroll it before framing. You will need the following supplies: Tension rod frame Nail gun or screwdriver and screws Then, follow these steps to begin stretching the picture frame: 1. Make sure the space is clean and free of dust and debris. 2. Place the canvas print face down. Measure the distance from each corner to make sure the canvas is flat. 3. Place the stretcher bar over the canvas print and begin folding the shorter edges over the stretcher bar. Use staples or screws to secure the canvas to the stretcher bar in the middle of the folded section. Finish by folding and stapling on all sides. 4. After stapling a nail in the center of each side, pull the canvas slightly, leaving enough room for it to unfold. Staple or screw in the center on both sides. 5. Finally, pull the corners tight, cut off the edges, and staple them to the stretching bar. Once the canvas print is secured to the stretching bar, it's time to add the final frame. Stretched canvas prints are easier to frame. You can use wooden frames or floating frames made specifically for canvas prints. Floating frames also eliminate the hassle of installing glass over the piece. In addition, the depth of the canvas print will affect the frame style you choose. To ensure a satisfactory fit, choose a frame with a notch depth greater than the canvas stretcher bar. 1.4 Adding Mounting Hardware The size and weight of the canvas and frame will determine which mounting hardware you choose. D-ring hangers are ideal for mounting both large and small canvas prints. To mount artwork using D-rings, you will need to have the following items on hand: D-ring kit (D-rings, screws and wires) Screwdriver Wire cutters Tape measure or straightedge Pencil Next, install the D-rings: 1. Measure down from the top of the left and right sides of the frame and mark the location of ⅓. 2. Attach one D-ring to the designated point, facing the top of the frame. 3. Wrap the wire around one of the rings, leaving a little excess at the end to wrap the wire. 4. Wrap it around the second ring and secure it by wrapping the excess wire at the end around itself. 5. Leave some gaps in the wire for hanging. 2. Installing the Canvas Print Before hanging your wall art, you need to have a plan. Consider the direction in which the canvas print will be hung. Will it be hung horizontally or vertically? Where will it be hung? Are the walls brick or drywall, and will they hold the weight of the print? Gather your tools, including wall anchors or hooks, a hammer, nails, a tape measure, and a pencil. Begin by measuring and marking the desired height on the wall. The center of the wall art should be 57 inches above the floor, which is at normal eye level. Then, mark the center of the item. From the center point, determine where the nails or wall anchors will hold the wires. Hammer the nail into the wall, leaving enough protrusion to wrap the wire around the nail to hang the canvas. 3. Inspection and Adjustment After mounting the framed canvas print, thoroughly inspect it for any visible defects or misalignment. Adjust the mounting hardware, canvas, or frame to ensure optimal positioning. Secure any loose parts and tighten screws to ensure that your artwork is held firmly in place and will not fall out. Probe underneath the frame to make sure the wire is hooked tightly around the nails and won't come off easily. 4. Cleaning and Maintenance You may need to know how to properly clean wall art made of different materials. And the best way to clean a framed canvas print is to dust it regularly. Gently wipe the frame or glass with a light, lint-free cloth. If dust accumulates on wall art, it will lose its color and look flat. Do not use harsh chemicals or abrasive items that can damage the canvas or frame. Dip the cloth in water and wring out the excess water. Gently wipe the canvas in one direction, avoiding circling and scrubbing. 5. Summarizing Framing your canvas prints is the ideal finishing touch for your artwork. You can try framing your canvas prints yourself as a way of enjoying life. Moreover, you can also opt for framers who have extensive knowledge. They can help you choose the best frame and ensure the professional framing of your artwork.
Learn more
Wall Art Size Guide: How to Choose the Perfect Fit for Every Space
Have you ever bought an amazing piece of wall art, but find that its wall art size makes it look odd on your wall? Maybe it is too small and disappears on the wall. Or it is too big and makes the room feel tight.If you have faced the same challenge as we described above, then you are in the right place. This size guide will cover everything you need to know to pick the perfect dimensions based on your space, style, and vision. Now let’s dive in.Why Wall Art Size MattersBefore you measure or plan your design, it’s important to know why size matters. The size of the art can change how a room feels. It can make a space feel balanced, bold, warm, or even messy.What is a Good Size for Wall Art?The right size depends on the wall and the furniture near it. A good rule is to make your wall art cover about 60% to 75% of the open wall space. Do not count moldings or trims. If you hang art above furniture, like a sofa or bed, the art should be about two-thirds to three-fourths the width of the furniture.The Impact of Wall Art in the HomeSize does more than just affect balance. It also changes how the art feels in the room. Big art pieces look bold and dramatic. They quickly become the center of attention. Small art can feel elegant and personal. When grouped together, small pieces can add depth and style. Picking the right size helps set the mood and keeps the room looking neat and balanced.Wall Art Size Standards & Selection GuideNow that we understand the importance of size, it’s time to explore standard measurements and practical techniques for choosing the perfect wall art size.Standard Wall Art Size ChartHere are some popular wall art dimensions that work well for different settings: Size Category Common Dimensions (inches) Best For Small 8"x10", 11"x14", 12"x18" Tight spaces, gallery wall groupings Medium 16"x20", 18"x24", 20"x30" Bedrooms, offices, entryways Large 24"x36", 30"x40", 36"x48" Living rooms, above sofas, beds, or large furniture pieces Oversized 40"x60" and up Expansive walls, open-concept spaces, high ceilings How to Choose the Best Fit for Your Wall SpaceHere are 3 simple steps to help on how to choose the best fit for your wall space.Step 1. Measure your wall or furniture width.Step 2. Multiply by 0.6 to 0.75 to find the target width range for your art.Step 3. Choose height proportionally (generally between 60–80% of the width).Example: If your sofa is 84" wide, your art should be approximately 50"–63" wide.Room-by-Room Size GuideDifferent rooms need different looks. Whether you are decorating your bedroom or your hallway, here is how to choose the mural size for each room.Living RoomOpt for large or oversized art above sofas and mantels. Gallery walls also work well if you want to create a visual story.BedroomMedium to large art is great above beds. Center it horizontally, about 6–8 inches above the headboard.Dining RoomChoose medium to large sizes that reflect the symmetry of the dining table. Horizontal layouts often work best.Entryway or HallwaySmall to medium pieces arranged vertically can elongate narrow spaces or guide guests visually through your home.Measuring Your Wall ProperlyBefore you start you choose your size of wall art, please prepare a measuring tape. Below are the detailed steps to measure your wall.First of all, you need to measure the width and height of the wall where you want to hang wall art. Next, check the space between the ceiling and the furniture, like a sofa or bed to make sure there is enough room for the artwork. A good tip is to hang the art at eye level. This means the center of the artwork should be about 57 to 60 inches from the floor.Last, don’t forget to leave equal space between each frame. These simple steps will help you pick a size that looks right and feels well-placed in your room.Styling & Grouping TechniquesOnce you’ve selected the right size of wall art, you need to think about how to style and arrange your wall art. How to Create a Gallery WallGallery walls offer flexibility and creativity. Mix prints, photographs, and textures to create a personal art story. Here’s how to do it:First of all, you need to choose a theme (e.g., black and white, botanical, travel photos)Then, plan the layout on the floor and keep the overall space proportional to the wallPick One or Three Large PiecesDesign experts often say to use odd numbers when decorating. One big piece makes a bold and clear statement. Three pieces, like a triptych, create balance and flow. If you use three pieces, space them evenly with about 2 to 3 inches between each.Standard Spacing Between PrintsSpacing matters just as much as the art itself. A good rule: Leave 2–3 inches of space between frames when creating a gallery wall. Aim for 6–8 inches of clearance between the top of your furniture and the bottom of the artwork. Position single art pieces so their center sits about 57–60 inches from the floor—eye level for most people. Uniform spacing gives your wall a clean and professional appearance.Mix and Match Themes & ColorsDon’t be afraid to mix different styles as long as there’s a unifying element. This could be: Color palette (e.g., warm tones or monochrome) Frame type (all black, all wood, etc.) Subject matter (all nature-themed, abstract, or architectural) A cohesive gallery wall or curated art collection enhances visual interest and allows your personality to shine through.Bring It to Life with Art Nouveau VisionChoosing the right size is just the first step. At Art Nouveau Vision, you can find many styles and sizes of wall art. You can pick the perfect piece for your space. Whether you want a big art piece for your living room or several small prints for your hallway, we have options for you. Art Nouveau Vision offers: Many themes and colors to match your home Different sizes to fit any wall High-quality prints at good prices No matter what wall art you need, Art Nouveau Vision helps you create beautiful walls.Final ThoughtsThis is all about mural sizewall art size guides. Choosing the right size of wall art is not hard. First, measure your wall space. Then, learn about common art sizes. Use a few simple design tips. This will help you turn any empty wall into a stylish and personal space.Want to get started? Check out the Art Nouveau Vision collection. Find art that fits your wall and makes your room look great.
Learn more
How Does the Size and Proportion of Wall Art Affect the Visual Effect of a Space?
When it comes to designing an aesthetically pleasing interior, choosing the right size and proportion for wall art is crucial. The way artwork interacts with a space can dramatically change the perception of size, balance, and overall harmony. Whether you're decorating a home, office, or commercial space, the right and wall decor can transform the ambiance, making it more inviting and visually appealing. The Impact of Scale on Wall Art The scale of wall art refers to how its size relates to the space it occupies. When artwork is too small for a large wall, it can appear insignificant and disconnected from the rest of the decor. On the other hand, oversized artwork in a small room can overwhelm the space, making it feel cramped. Striking the right balance is essential for creating a cohesive look. For instance, in a spacious living room with high ceilings, a large vertical piece can make a striking statement. It draws the eye upward, emphasizing the room’s height and grandeur. Conversely, in a smaller bedroom or hallway, a series of smaller pieces arranged in a gallery format can add character without overpowering the space. Proportion and Harmony in Wall Decor Proportion is about how different elements relate to each other within a space. Wall art should complement the furniture and other decorative elements rather than compete with them. A common rule of thumb is the two-thirds rule: wall art should take up approximately two-thirds of the width of the furniture below it. For example, if you have a 90-inch sofa, the artwork above it should be around 60 inches wide to maintain balance. For rooms with a strong symmetrical layout, such as a dining area with a central table, symmetrical artwork like paired vertical pieces can enhance the structured look. In more casual, eclectic spaces, an asymmetrical arrangement with varying sizes of frames can create a dynamic, artistic feel. Another crucial consideration is the positioning of artwork. Hanging a piece too high or too low can disrupt the overall flow of a space. The ideal height for artwork placement is generally at eye level, around 57-60 inches from the floor to the center of the piece. However, this rule can be adjusted depending on furniture placement and room dynamics. Different Shapes for Different Effects The shape of wall art also influences perception. Vertical artwork makes walls seem taller, perfect for rooms with lower ceilings or narrow spaces like hallways. Horizontal artwork, on the other hand, can make a room feel wider, which is ideal for small apartments or compact offices. For a balanced approach, square wall art works well in symmetrical settings, such as above a console table or bed, where equal proportions contribute to a sense of stability and order. Additionally, multi-panel or triptych wall art can create a panoramic effect, drawing the viewer’s eye across a broader expanse. This type of artwork is ideal for long corridors, above sectional sofas, or as a focal point in a dining room. By breaking up a single image into multiple panels, it adds movement and intrigue to a space while still maintaining cohesion. Creating Visual Impact with Groupings Sometimes, a single large piece of wall art may not be the best option. Instead, a curated gallery wall can create an engaging focal point. A mix of sizes, frames, and orientations can add layers of interest to an otherwise blank wall. When designing a gallery wall, it’s essential to maintain consistency—whether in color scheme, frame style, or subject matter—to avoid visual chaos. For instance, a series of black-and-white photography prints can create a sophisticated, timeless look, while a mix of abstract art in bold colors can energize a modern living space. The key is to ensure spacing is consistent, typically around 2-3 inches between frames, to maintain a polished, cohesive appearance. Another effective way to enhance wall decor is through layering. Layering artwork by placing smaller frames in front of larger ones on shelves or mantels can create depth and a more organic, lived-in look. This technique is particularly useful in bohemian or eclectic interior styles. Wall Art in Commercial Spaces The principles of scale and proportion in wall art also extend to commercial environments. Whether it's a café, hotel, or office lobby, well-chosen artwork can enhance brand identity and customer experience. Studies show that strategically placed art can influence emotions and behavior, making spaces feel more welcoming and engaging. If you're interested in how wall art can enhance commercial spaces, check this article for more insights. For example, a restaurant looking to create a cozy, intimate atmosphere might opt for smaller, framed artworks arranged in clusters, while a contemporary corporate office could benefit from large-scale abstract pieces that project confidence and creativity. Hotels often use oversized statement pieces in lobbies to make a lasting first impression and set the tone for the guest experience. Practical Tips for Choosing the Right Wall Art Size Here are a few additional tips to help you choose the right size and proportion of wall art for your space: 1. Consider Wall Dimensions: If you have a large empty wall, opt for bigger artwork or a well-curated gallery wall to prevent the space from feeling barren. 2. Match Furniture Scale: Ensure the artwork is proportionate to the furniture beneath it. A tiny picture over a massive couch may look awkward, whereas a larger statement piece will feel more integrated. 3. Test With Paper Templates: Before hanging your artwork, use paper cutouts of different sizes to visualize how they will look on the wall. 4. Use Mirrors for Expansion: If you are unsure about committing to oversized wall art, consider using decorative mirrors, which can create the illusion of space while still adding visual interest. 5. Mix Textures and Materials: In addition to paintings and prints, consider incorporating woven textiles, metal art, or sculptural wall decor to add depth and variety. Conclusion Choosing the right size and proportion for wall art is essential for achieving a harmonious and visually appealing space. By considering the scale, proportion, and shape of artwork, you can enhance the overall aesthetic and mood of any room. Whether you opt for vertical wall art, square pieces, or a carefully curated gallery wall, the key is to ensure that your choices complement the existing decor and architectural features. The right balance will transform your space, making it more inviting, dynamic, and well-designed. With thoughtful planning and strategic placement, wall art and wall decor can become more than just decorations—they can be powerful tools in shaping the atmosphere of a home or business. Experiment with different styles and arrangements to find the perfect visual harmony for your space.
Learn more
How to Hang Wall Art?
Although wall art decoration can better decorate our room. But the key to the beauty of wall art is how we hang it. If you know how to hang wall art decor. Then no matter what kind of wall art can be as beautiful as Picasso or Matisse's masterpiece. Visit Art Nouveau Vision for more wall art inspiration, or explore their Straight Line Wall Art and All Wall Art Collections. Next, we learn how to hang wall art. No matter what your budget or level of expertise, you can know how to use this wall art to decorate your room. 1. How to hang wall art so it looks nice and fits well on your wall? 1.1 Consider the Practicality of the Room Small wall art can get lost on huge walls. Large wall art, on the other hand, will take up more space. Therefore, if the wall art you choose is not compatible with the space. Then the impact of the artwork, no matter how grand, will be greatly diminished. 1.2 Consider the Existing Items In addition, you need to consider what will be around the wall art and how the light will be distributed in the room during the day. Do you want the wall art to be the centerpiece? Or do you want it to be positioned more subtly? Think about sight lines and what you initially see when you enter the room. 1.3 Unique Places Don't be afraid to hang decor wall art in unexpected places. This is because your relationship with a piece should be central, and the surrounding decor is secondary. Contemporary wall art can look great in a traditionally furnished space and vice versa. 2. How to Hang Wall Art in the Right Spot (Easy Tips) Hanging wall art decor at eye level is usually a safe solution. This usually means placing the center of the photo 57-60 inches above the floor. This distance is based on the ceiling height of the room as well as your height. As a general rule, hang wall art lower in areas where you or your guests often sit. This will keep it within natural view and will have a great decorative effect. Additionally, large wall art should occupy a wide space. It may work better if it is left to hang alone and not look cluttered. Also, as with any decorating rule, some flexibility is required. You may have other artwork to place, or a mantelpiece placed awkwardly. Don't worry if the midpoint of the wall art decor is not at eye level. You can also trust your instincts and hang it in the right spot. In fact, this is a good way to hang wall art. 2.1 How to Hang Multiple Pieces of Decor Wall Art? What should I do if I want to hang multiple pieces of wall art? Generally, it is wise to hang the largest piece of wall art decor first. Then, hang around it depending on the size of the rest of the wall decor. It's important to note that you can experiment with several combinations on the floor before you start punching holes in the wall. This will allow you to visualize what the finished wall will look like first. In addition, it may be a mistake to hang the wall art decor too symmetrically. Therefore, you can also hang it in a variety of different ways, which may be more interesting. Think about hanging one or two pieces of wall art on top of another. Of course, you can also hang a group of paintings in four groups. On the other hand, different locations require different compositions. Therefore, you can hang more formal wall art decorations in hallways, dining rooms, or certain drawing rooms. For example, wall art that is symmetrical with the space and furniture. In other places, you can hang more intimate and elaborate art decor to add privacy to the space. For example, snail mail, library, office, bedroom, or downstairs restroom. 3. Things to Avoid When Hanging Wall Art 3.1 Avoid Direct Sunlight When hanging wall art, do not place it in direct sunlight. This is because it may cause irreparable damage to the wall art decoration. This is especially important for paper works, but it also applies to all artwork. Additionally, you can use picture lights to highlight important elements of your art décor. Spotlights and angled ceiling lights are effective. 3.2 Choose UV-resistant Glass It is important to note that no glass can protect against direct sunlight. However, you can consider UV-resistant glass to protect artwork in frames. Museum glass is the most suitable choice, but it is more expensive. 3.3 Consider the Conditions of the Room It is also important to consider the conditions of the room when hanging wall art. Kitchens and bathrooms may not be the best places to hang wall art. This is because they are usually humid and stuffy, which can cause damage to the wall art. For the same reason, radiators or fireplaces are not always ideal locations. 3.4 Pay Attention to Matching If the wall art decor is of low quality, then don't hang it too formally. Also, don't place delicate artwork next to bold, substandard pieces. This is because low-quality wall art may have a negative impact. In conclusion, don't mix very poor wall art with high-quality wall art pieces. Because it means that good work can't show its impact. 4. DIY or Hire a Professional? Using a professional to hang wall art is an excellent investment. They can hang tons of wall art decorations in a single day. And you can be sure that each painting will be hung accurately, with no unsightly holes or marks on the wall. Of course, you can also hang the wall art yourself. One thing to keep in mind is to make sure that you have a level or laser level on hand for greater accuracy. It is recommended that you use the level to determine the location first and then immediately hang the wall art decor on two hooks or screws. In addition, do not hang the wall art on rope or wire. This is because the rope or wire cannot fully support the wall art. And because wall art decorations can shift, they are rarely perfectly level. It is important to note that large wall art should always be hung by a professional. If you can't hold it, don't try to hang it yourself. Additionally, if you force hang it yourself, there is a risk of damage to the large wall art. 5. Summary When hanging wall art, start by laying out all of your wall art decor on the floor. This will allow you to see how they fit together to get a sense of space. Remember that you need to break up the lines of the wall and avoid hanging the wall art in neat rows. This is because it may look uninteresting. If you have customized wall art or expensive wallpaper. Then it is recommended that you use an invisible hanging system. These helpful rails will prevent you from drilling holes in the wall and causing damage. In order to leave the wall unmarked, it is recommended that you use sticky notes instead of pencils to mark the boundaries of the framed wall art and the location of the hooks.
Learn more